The Exposure Triangle Made Simple | A Beginner Photography Guide by FTP Studios | Kim Hannah
The Exposure Triangle Made Simple
A Beginner Photography Guide by FTP Studios Academy | Kim Hannah - Learn to use your camera in manual mode
If you’re brand new to photography and feel overwhelmed by camera settings — you’re not alone. At FTP Studios Academy, we teach photographers every day who feel stuck shooting on Auto because Manual mode feels intimidating.
The good news? Once you understand the Exposure Triangle, everything starts to click.
This guide breaks it down in a simple, real-world way — no technical fluff, no gatekeeping — just practical knowledge you can actually use.
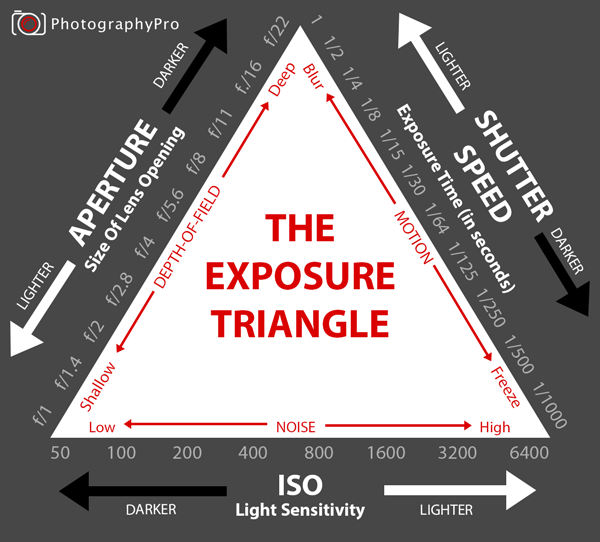
What Is the Exposure Triangle?
The exposure triangle is the foundation of photography. It’s made up of three settings that work together to control light:
Aperture
Shutter Speed
ISO
Change one, and the others are affected. When you understand how they balance each other, you stop guessing — and start creating images on purpose.
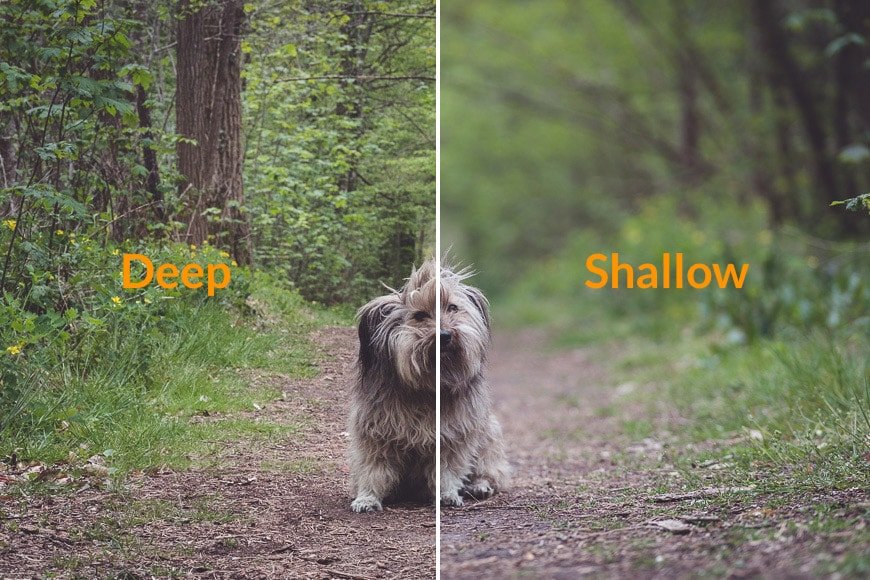
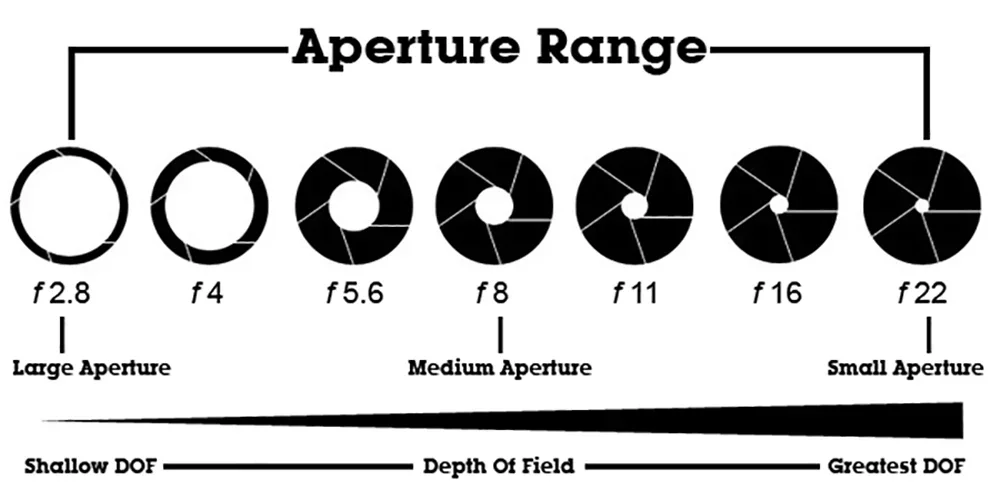
Aperture: Light + Background Control
Aperture controls how wide your lens opens to let light in. It’s measured in f-stops (f/1.8, f/2.8, f/5.6, etc.).
Why aperture matters:
Lower f-number (f/1.8–f/2.8)
→ More light, softer backgroundsHigher f-number (f/5.6–f/8)
→ Less light, more in focus
aperture is what gives you that dreamy, professional background blur.
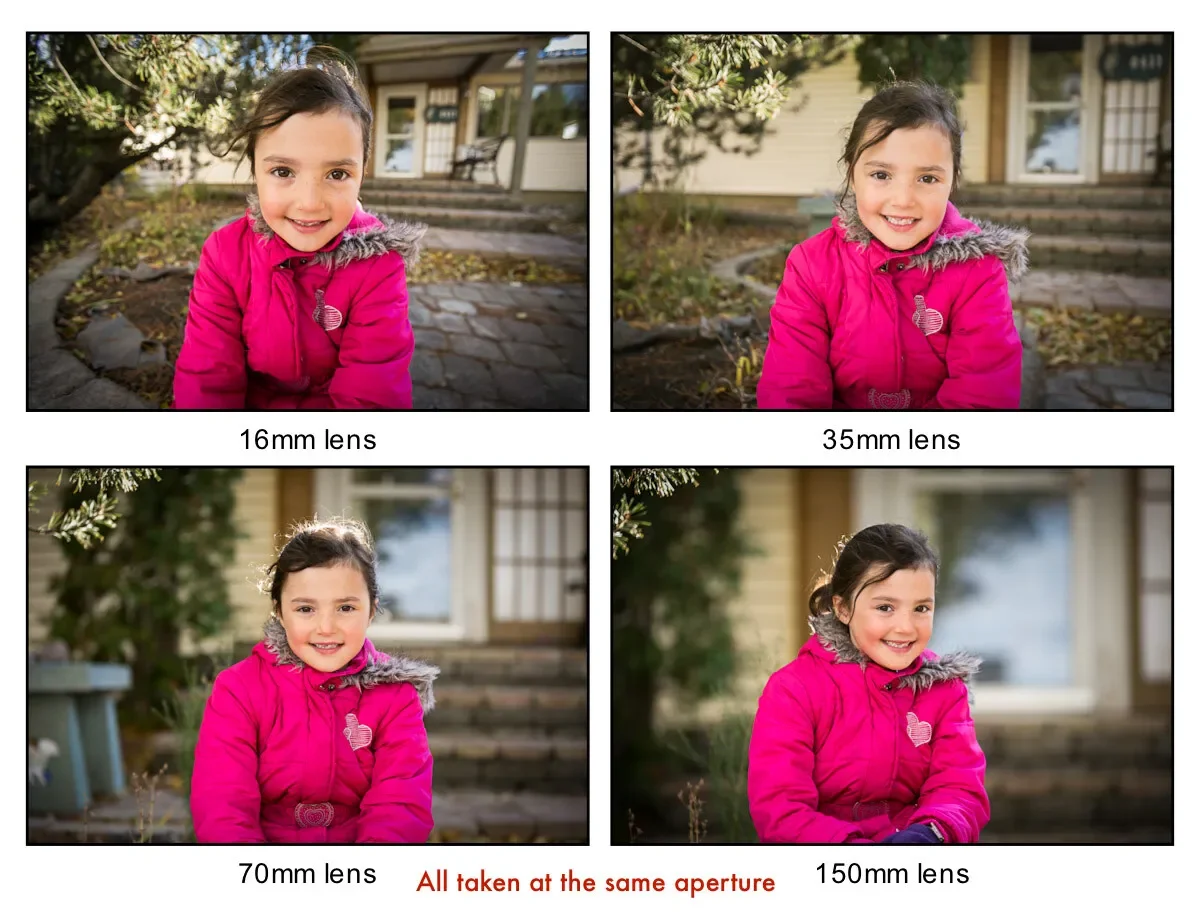
Great starting points:
Portraits & newborns: f/2–f/3.5
Groups: f/5.6–f/8
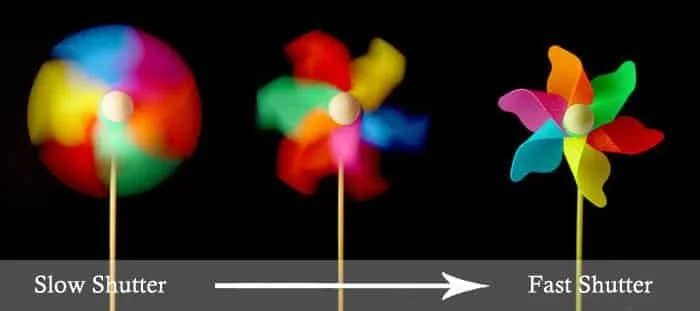
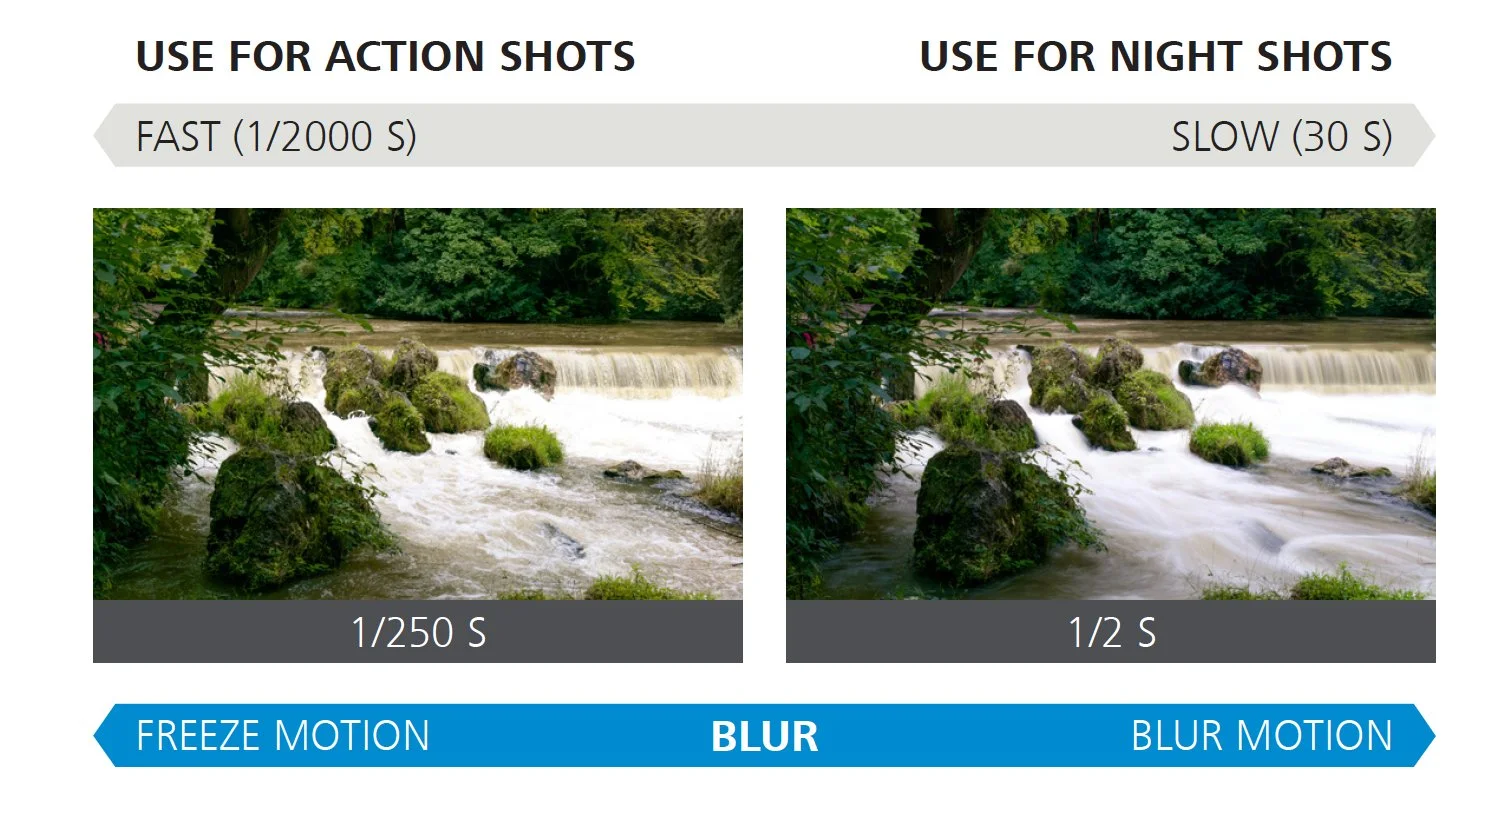
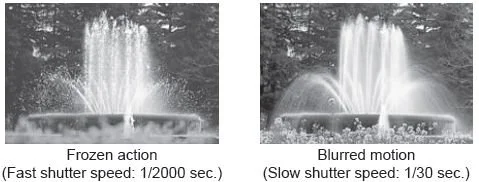
Shutter Speed: Freezing Motion or Creating Blur
Shutter speed controls how long your camera sees the scene.
How it affects your image:
Fast shutter (1/250–1/500) → Freezes motion
Slow shutter (1/60 or slower) → Motion blur
If your images look soft or blurry, shutter speed is almost always the issue — not your camera.
If your subject can move, your shutter speed should be faster than you think.
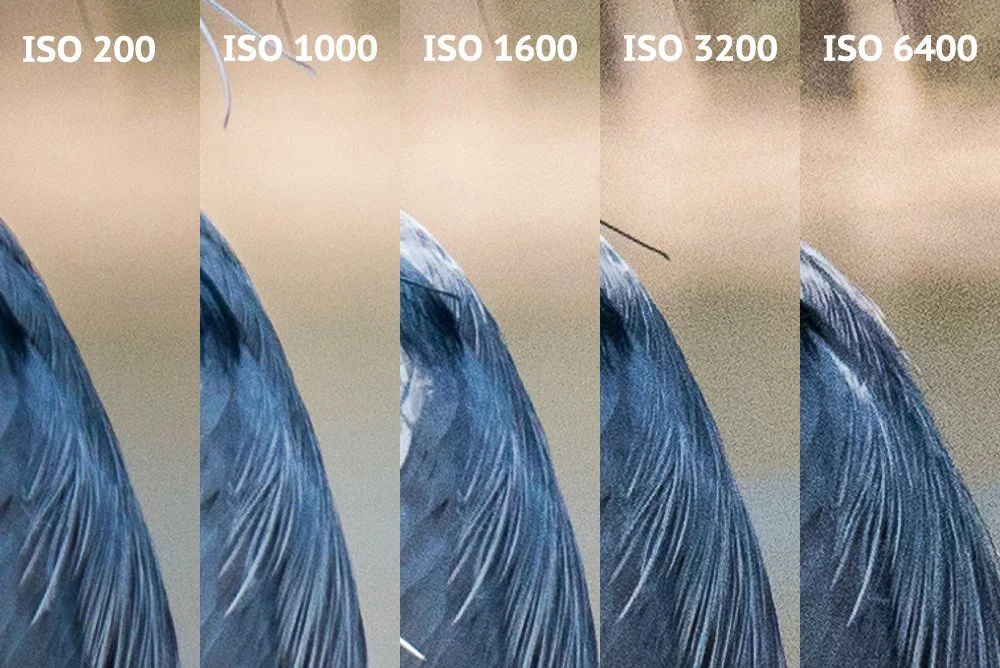
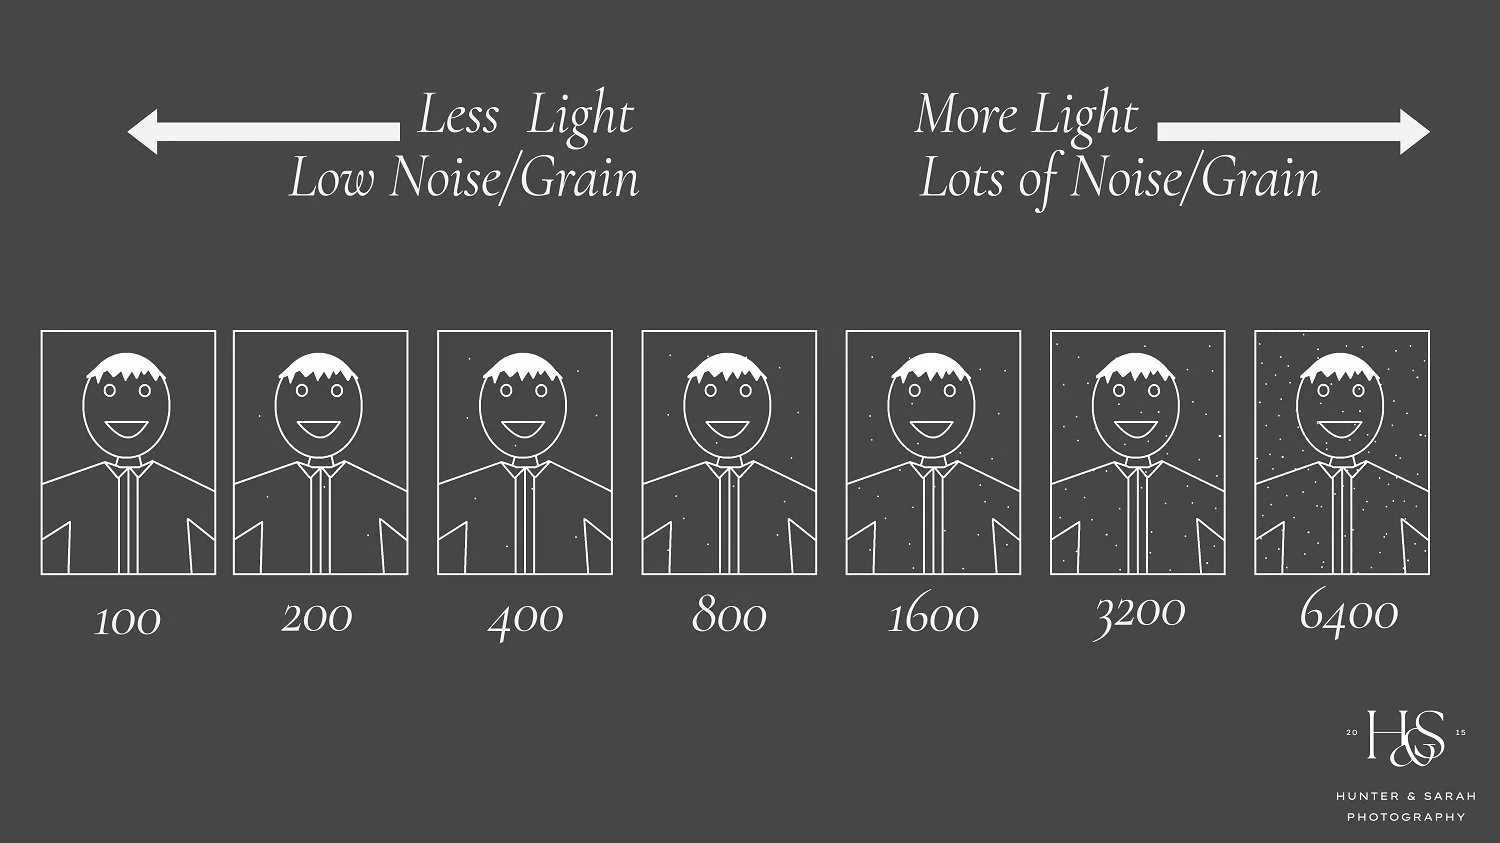
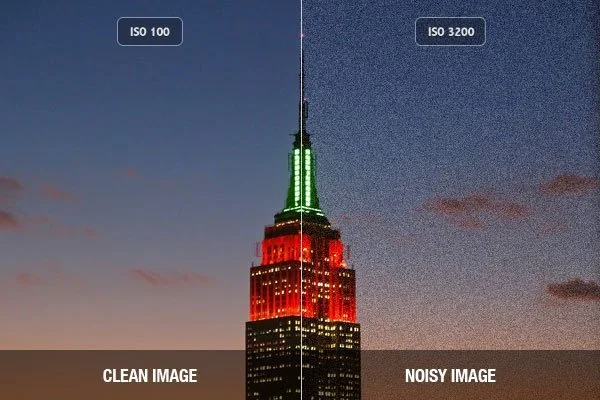
ISO: Brightness vs Grain
ISO controls how sensitive your camera sensor is to light.
What to know:
Low ISO (100–200) → Clean, crisp images
High ISO (1600+) → Brighter, but grainy
We always teach photographers to use ISO last. Open your aperture or increase shutter speed first, then raise ISO only if you need to.
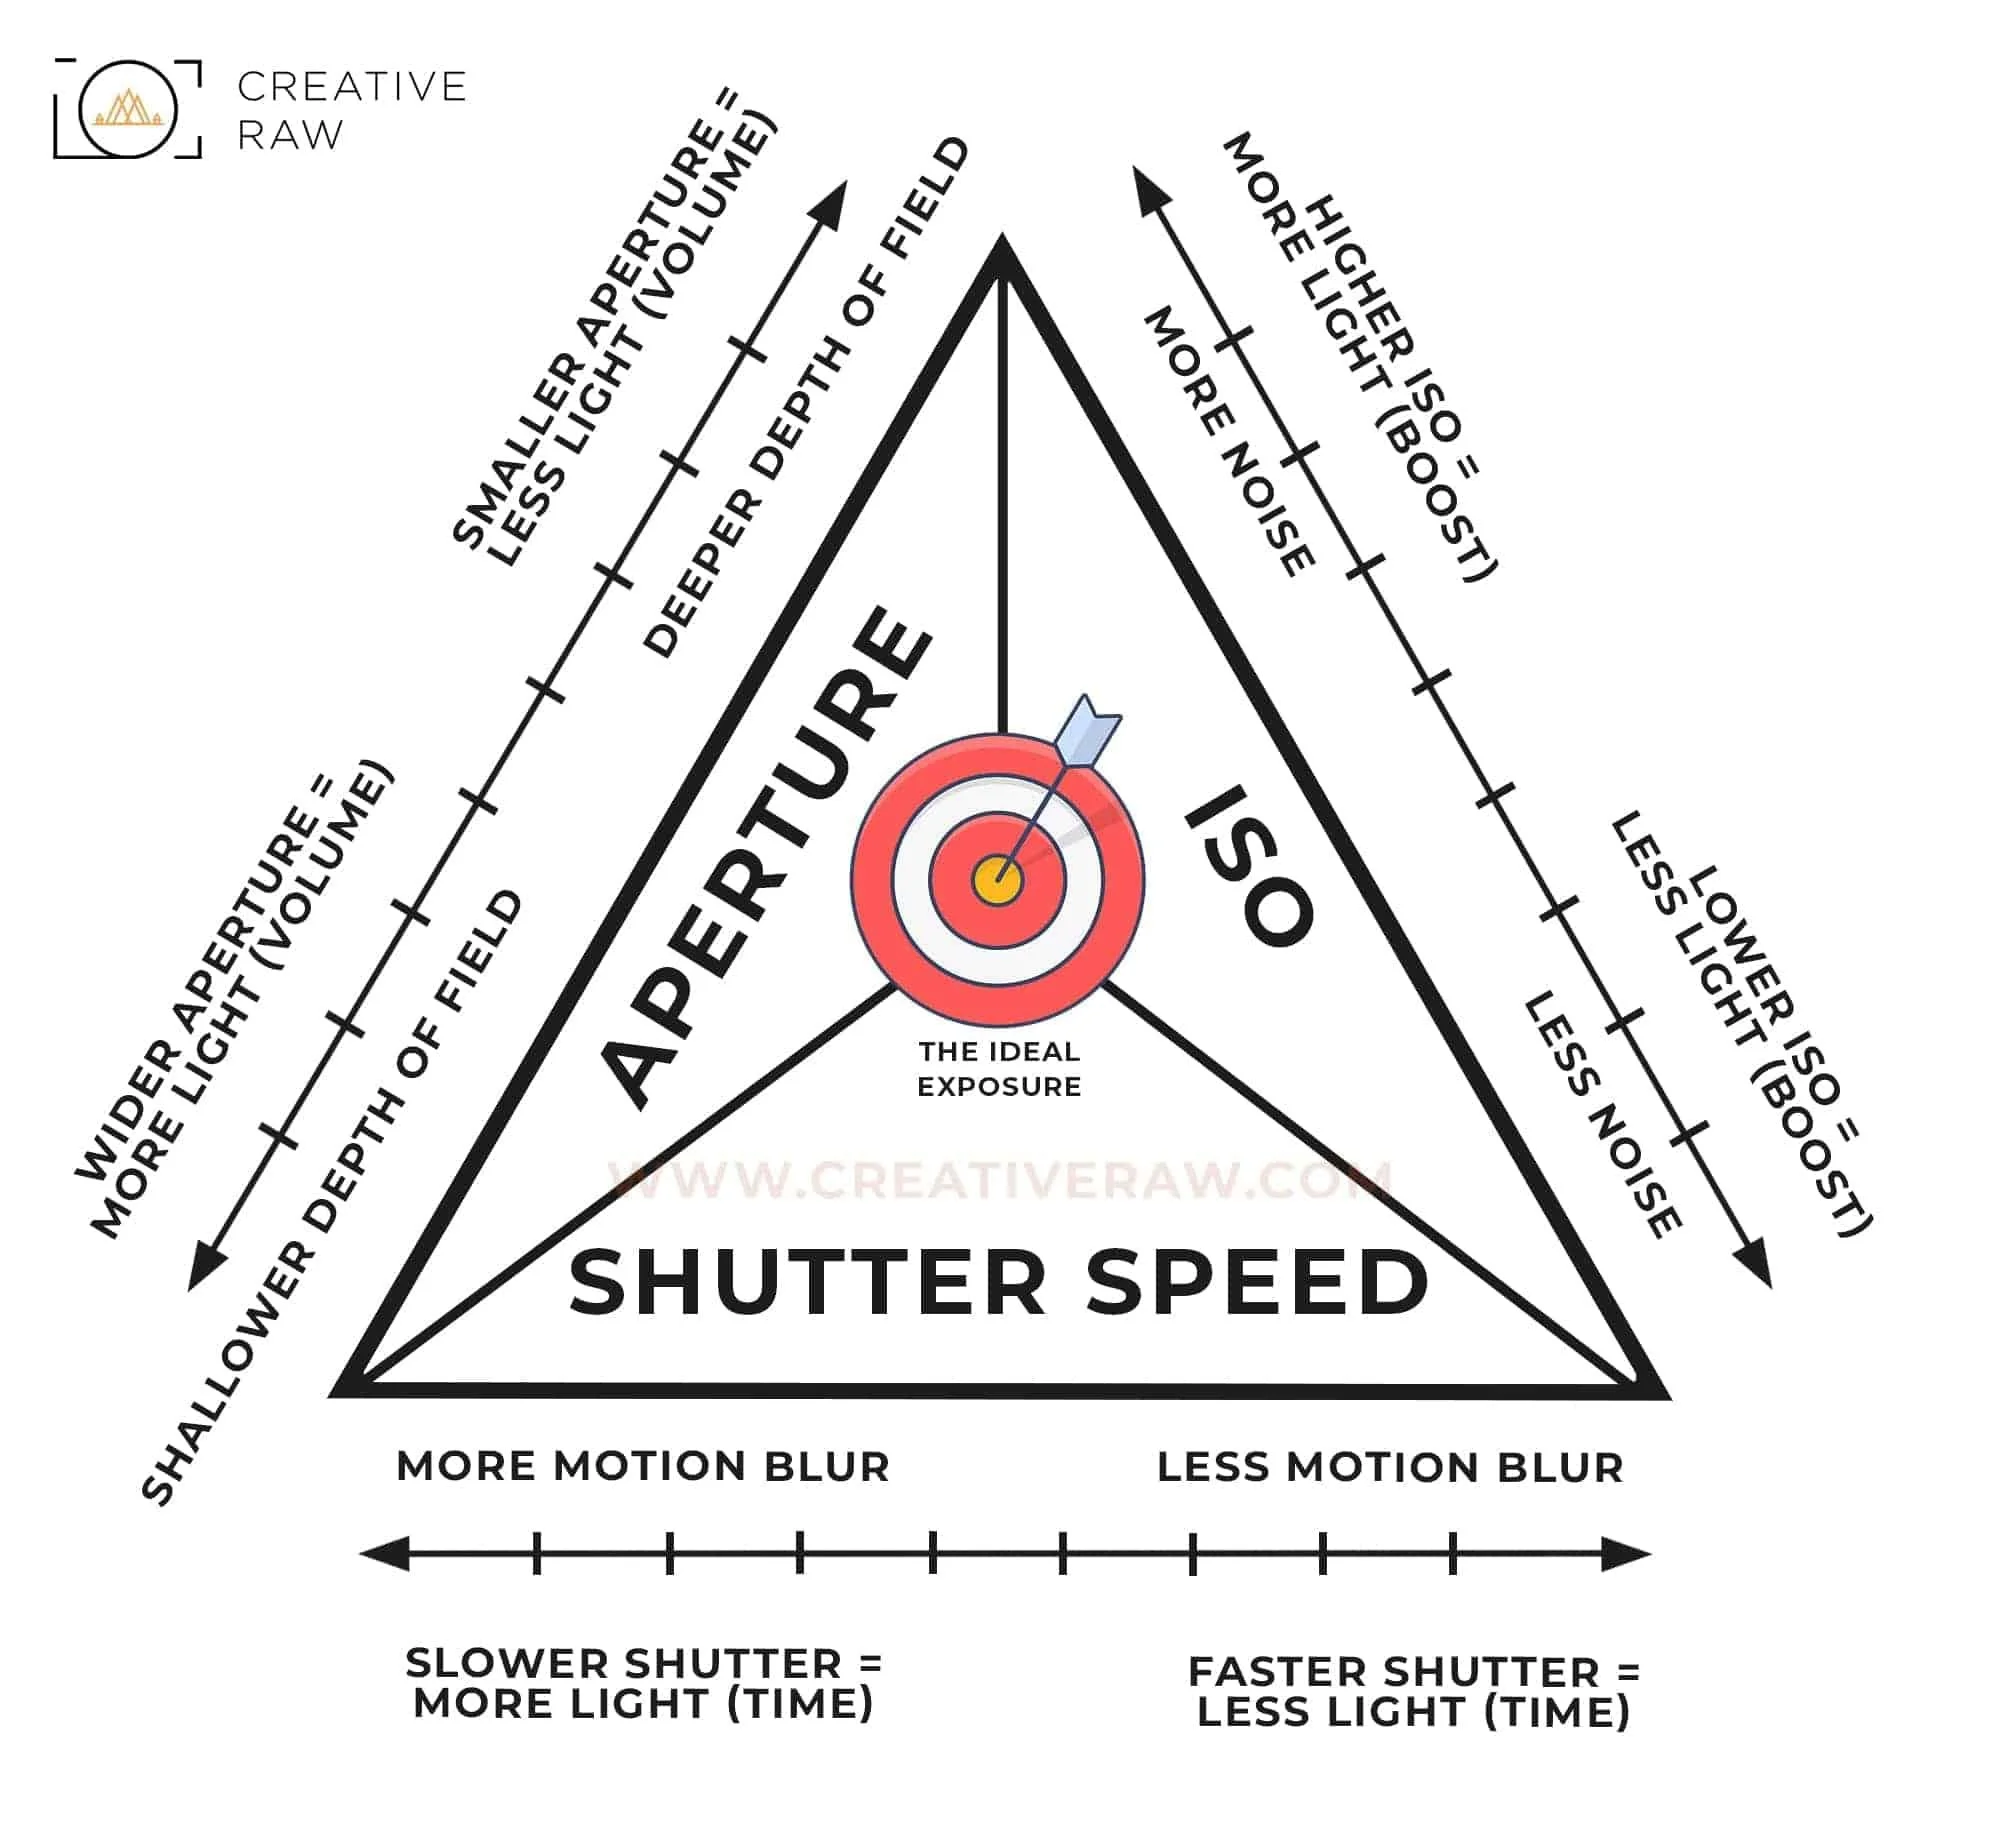
How the Triangle Works Together (This Is the Key)
Here’s the truth most beginners aren’t told:
👉 You never adjust just ONE setting.
Open your aperture → you’ll likely need a faster shutter speed
Slow your shutter → you may need lower ISO
Increase ISO → you can keep your shutter faster in low light
Once this clicks, Manual mode stops being scary and starts being empowering.
A Simple Beginner Setup (Try This First)
For indoor, natural-light portraits:
Aperture: f/2.8
Shutter Speed: 1/200
ISO: Adjust until properly exposed
This is a solid baseline you can use in many situations.
Every confident photographer you admire once stood exactly where you are now — confused, frustrated, and unsure of their settings.
Understanding the exposure triangle is the first real step toward consistency, confidence, and creative control.
And remember: learning your camera is just the beginning. Editing, workflow, and using modern tools are what take your photography from “okay” to next level.
Be sure you are in our FB learning group. where new photographers and seasoned photographers alike come together. Never stop learning !